
I'm sliding in with a quick post today! We have a house full of company; it's summer, and I love you...
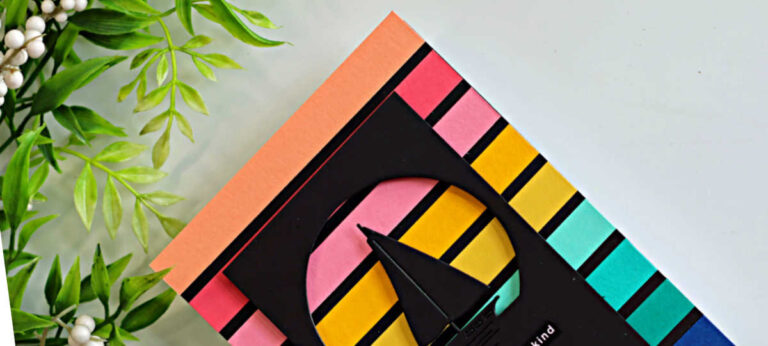
Hey cardmaking friends! I have a fun and super easy card to share with you today -- my Easy Rainbow...
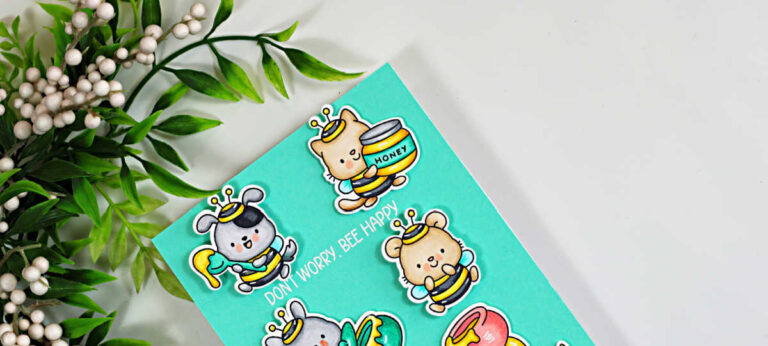
Today, I'm sharing an Easy Spinner Card with Cute Bee Critters featuring the adorable Bee's Knees Stamp...
Nesting dies are one of those basic supplies we tend to reach for again and again - usually to create...
Hi cardmaking friends! I'm excited to be joining Simon Says Stamp today for Day 2 of the Every Happiness...
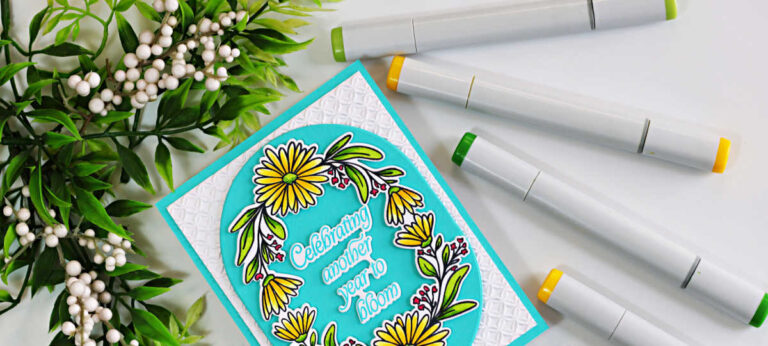
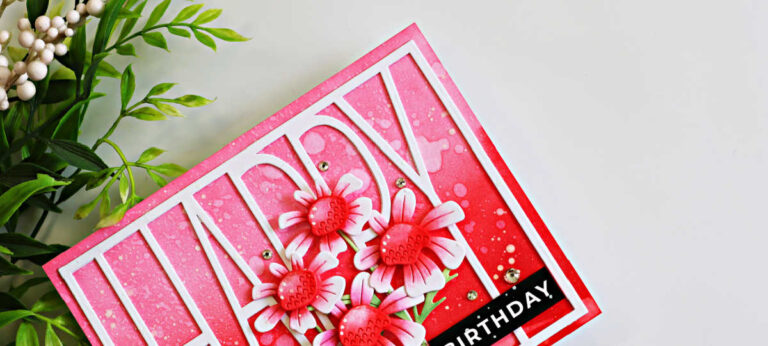
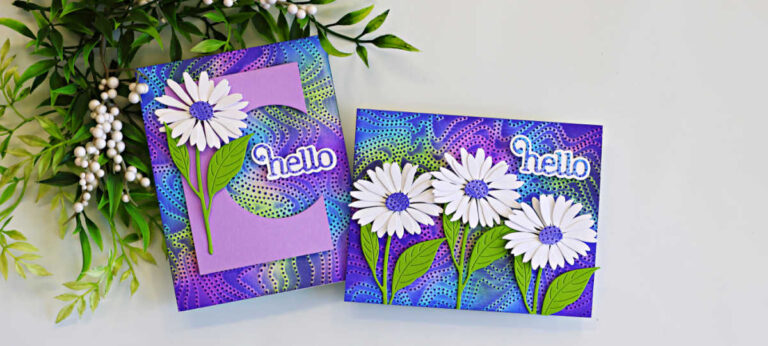
Today I'm sharing a bright and cheerful birthday card featuring the beautiful new Daisy Frame from the...
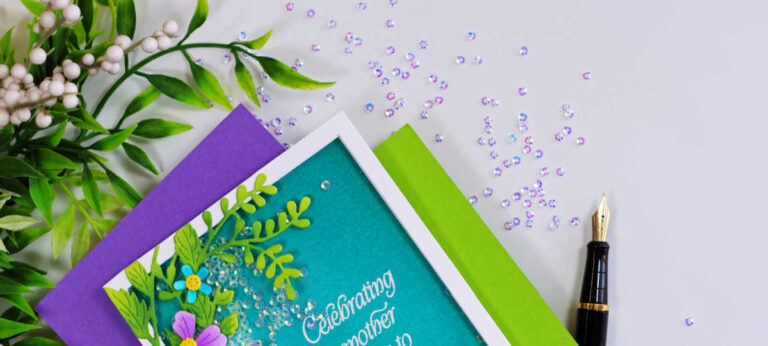
Good evening. I'm excited to share the new Simon Says Stamp Every Happiness Release with you tonight,...
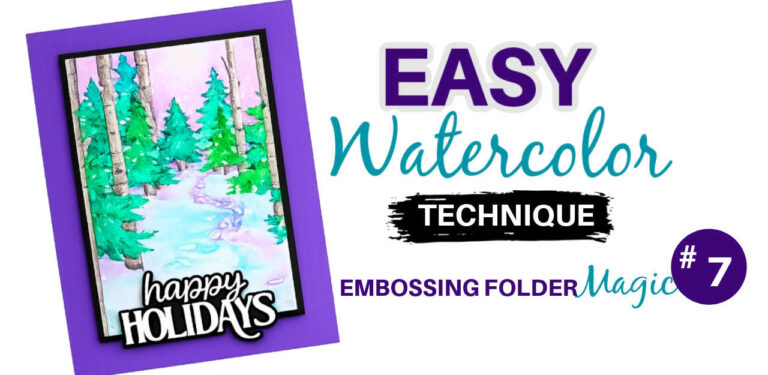
Today I'm sharing an Easy Watercolor Embossing Folder Technique using the beautiful new Snowy Footpath...

I'm toning things down for today's card with the soft pastel shades of Celery and Seafoam Ink to create...
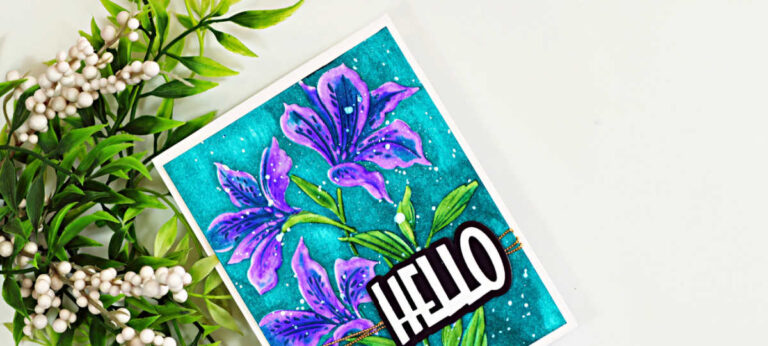
have a stunning Dark and Moody card to share with you today
I have a super quick and easy Masculine card to share with you today, complete with a fun retro vibe...
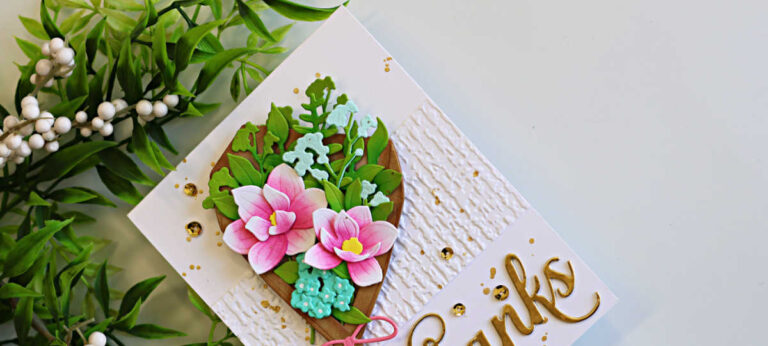
Today I'm sharing this Elegant Parchment Bouquet Thank You Card featuring the beautiful Altenew Parchment...
While cleaning up the creative hurricane from my last video, I discovered I had one Faux Watercolor panel...
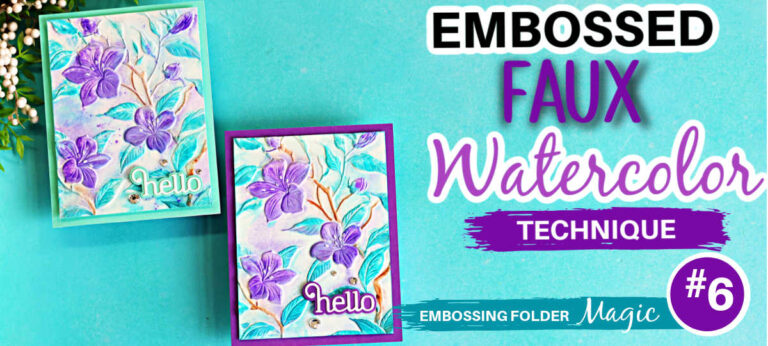
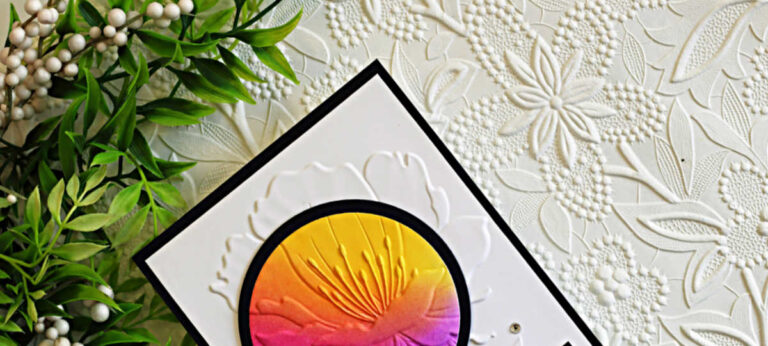
Today I'm sharing Embossing Folder Magic #6 - How to Create Faux Watercolor with Embossing Folders.

I have so much fun creating today's card! Spellbinders recently sent me some of their new Card Spin...
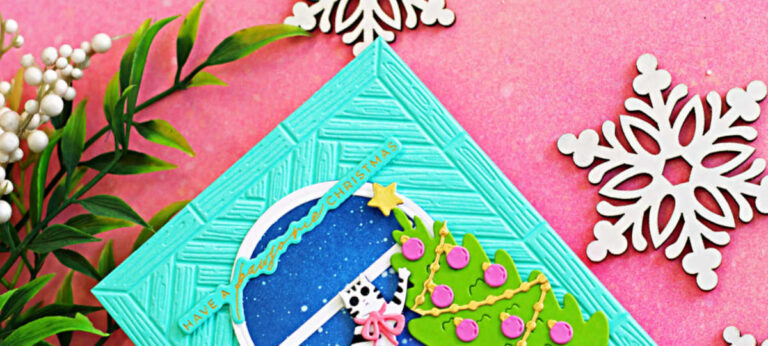
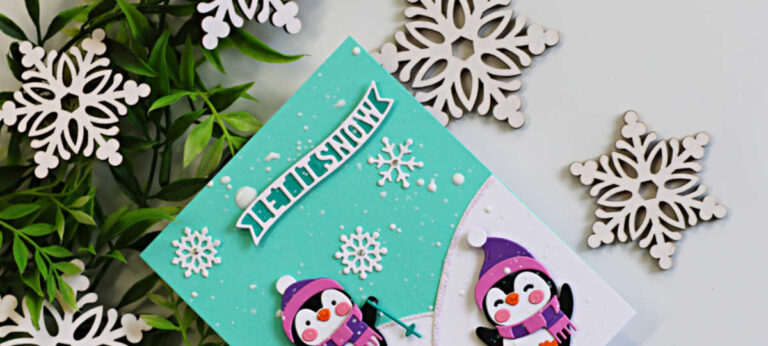
Hi cardmaking friends! I have another Cute Christmas Cat Window Scene Card to share with you today,...


Spellbinders has a whole collection of exciting new releases today, and it was so hard to decide what...
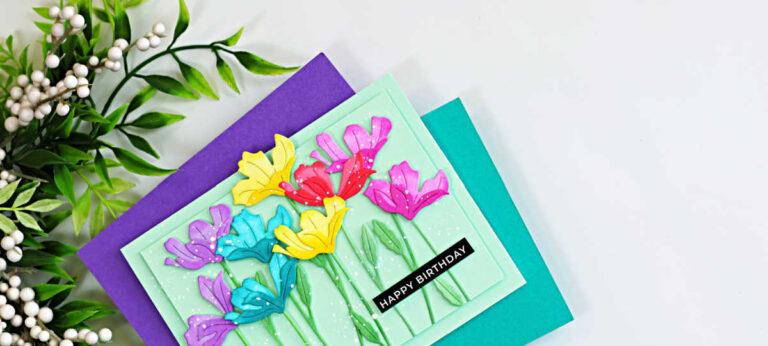
Today I'm sharing a cheerful birthday card created with the Quirky Daisies and Tall Happy Cover Die from...
Today I'm sharing my Merry Shuffle Single Z-Fold Christmas Card, created with the Spellbinders Large...
Hey cardmaking friends! It's the 6th of the month, which means NEW CLUBS from SPELLBINDERS.
I recently treated myself to the Spellbinders The Weekend Craft Kit. I know.... it's a month after the...
Hey cardmaking friends! I'm back tonight with another Easy Spotlight Technique featuring the Curvy Blossom...
I asked if you wanted a video on this technique, and the answer was a resounding YES, so here it is!...
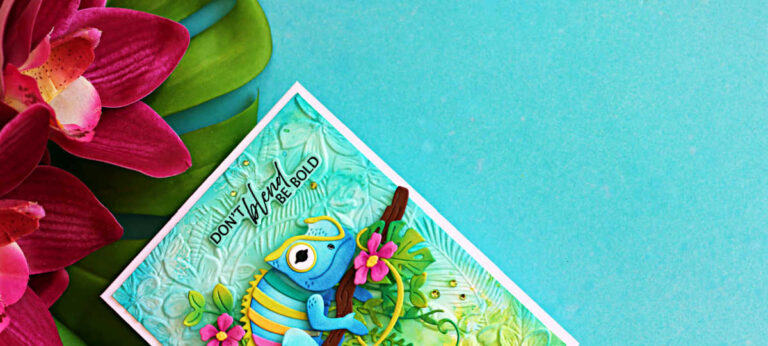
Today I'm taking a little break from embossing folders to play with some beautiful new products from...
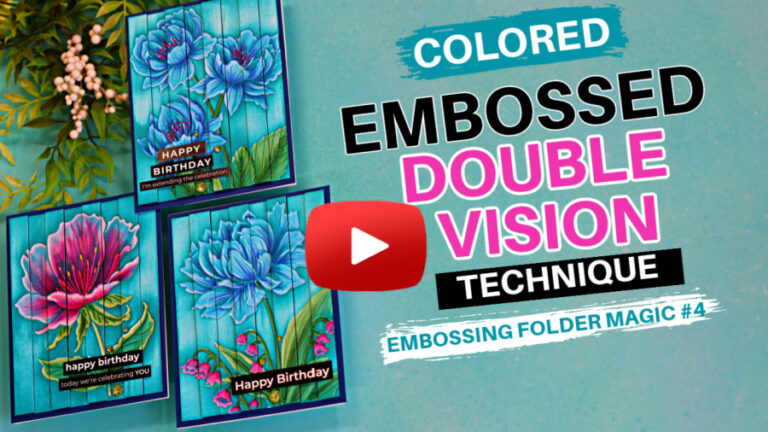
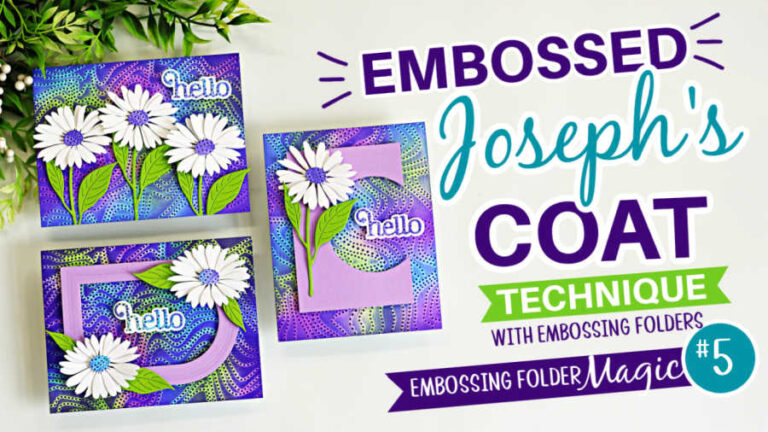
I took last week's Embossed Double Vision Technique Video, and gave it a colorful makeover
I'm so excited to be joining Simon Says Stamp for the Shine On Release Blog Hop.
Good evening! I'm excited to share a project with you tonight featuring two new products from the NEW...
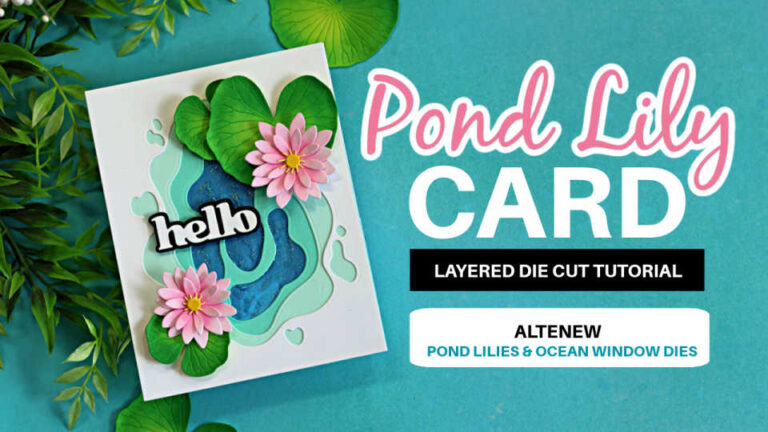
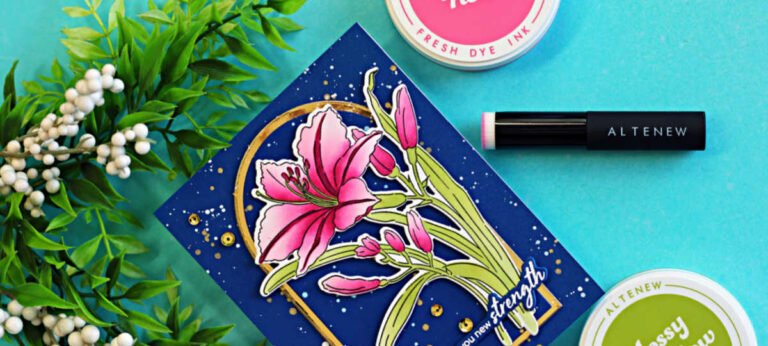
I have a New Cardmaking video to share with you today featuring some fabulous products from Altenew's...
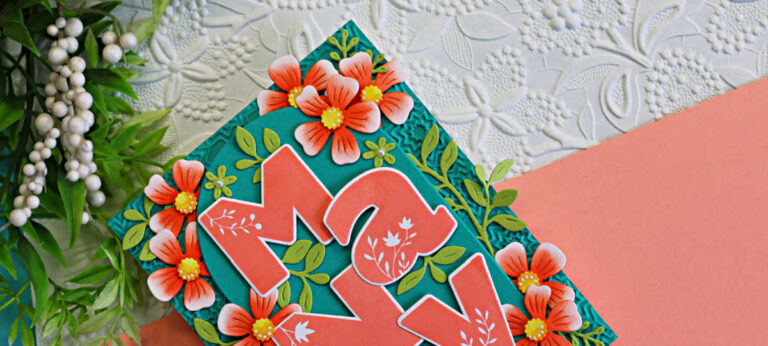
I'm so excited to be joining Spellbinders in celebrating their 23rd birthday with this fabulous blog...
Hi cardmaking friends, welcome back. Today I'm sharing a beautiful stenciled floral card featuring the...
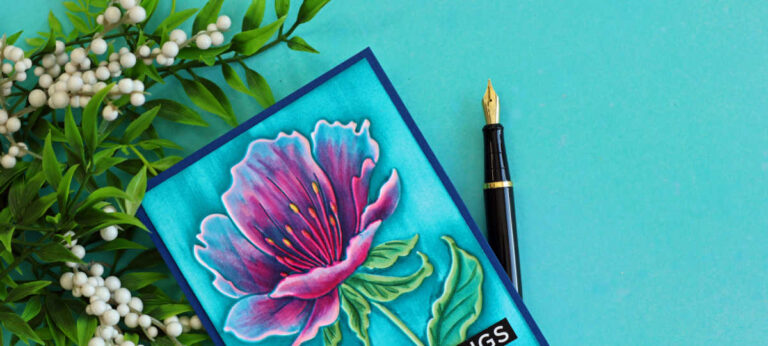
I have a super fun (and easy) technique to share with you today called the Embossed Double Vision Te...
